How to Set Up Bank Transfer +
How to Add Funds via Bank Transfer +
How to Transfer Out Funds via Bank Transfer +
How to View Your Transaction History
How to Set Up Bank Transfer +
Step 1: On the Home page of your Bybit App, tap More → Buy Crypto.
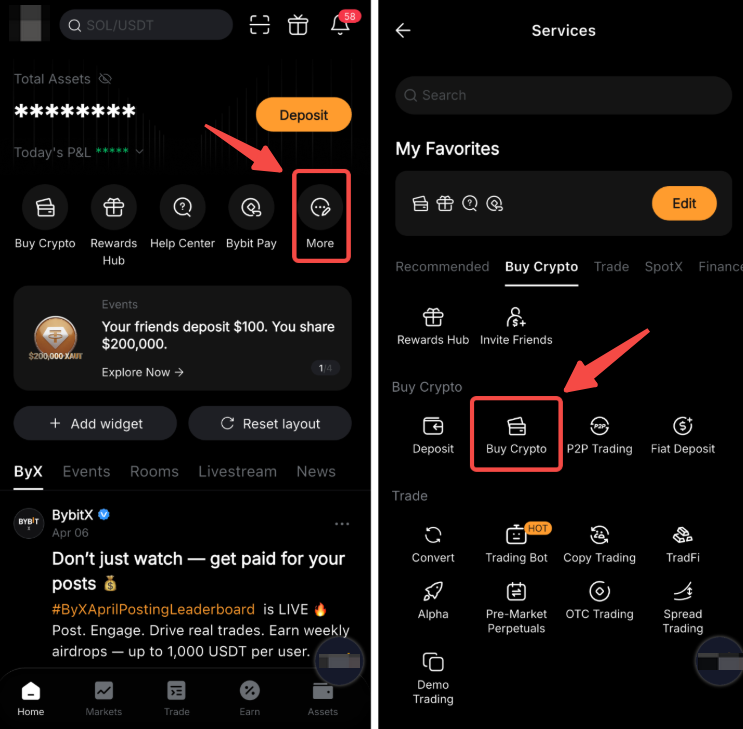
Step 2: Select Bank Transfer + as your payment method and tap Next to continue.
Step 3: Follow the on-screen instructions to complete the required verification. Depending on your country and profile, you may be required to:
- Submit your ID card and passport information
- Provide your address details and/or proof of address
- Complete a short questionnaire covering your purpose for opening the account, employment status, source of income, etc.
- Complete Enhanced Due Diligence (EDD) by providing additional information
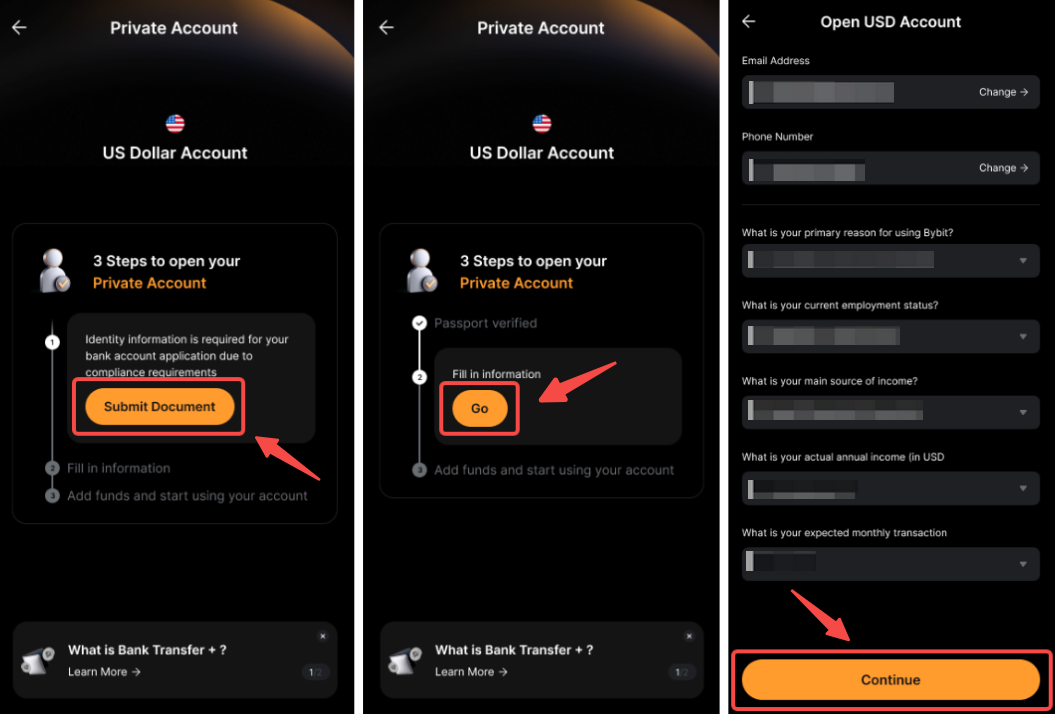
Note: You may need to wait for each step to be approved before proceeding.
Step 4: Review and agree to the applicable terms and conditions, then tap Confirm to continue.
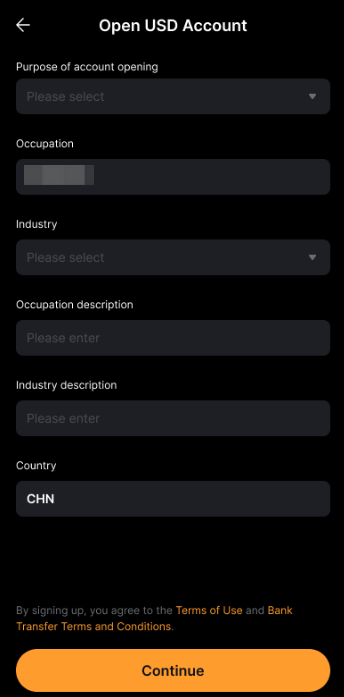
Step 4: Your application will be reviewed within 7 business days. You'll receive a push notification and email once Bank Transfer + has been successfully set up.
How to Add Funds via Bank Transfer +
After setting up Bank Transfer +, you can transfer fiat currency from your bank account and receive USDT or USDC in your Funding Account.
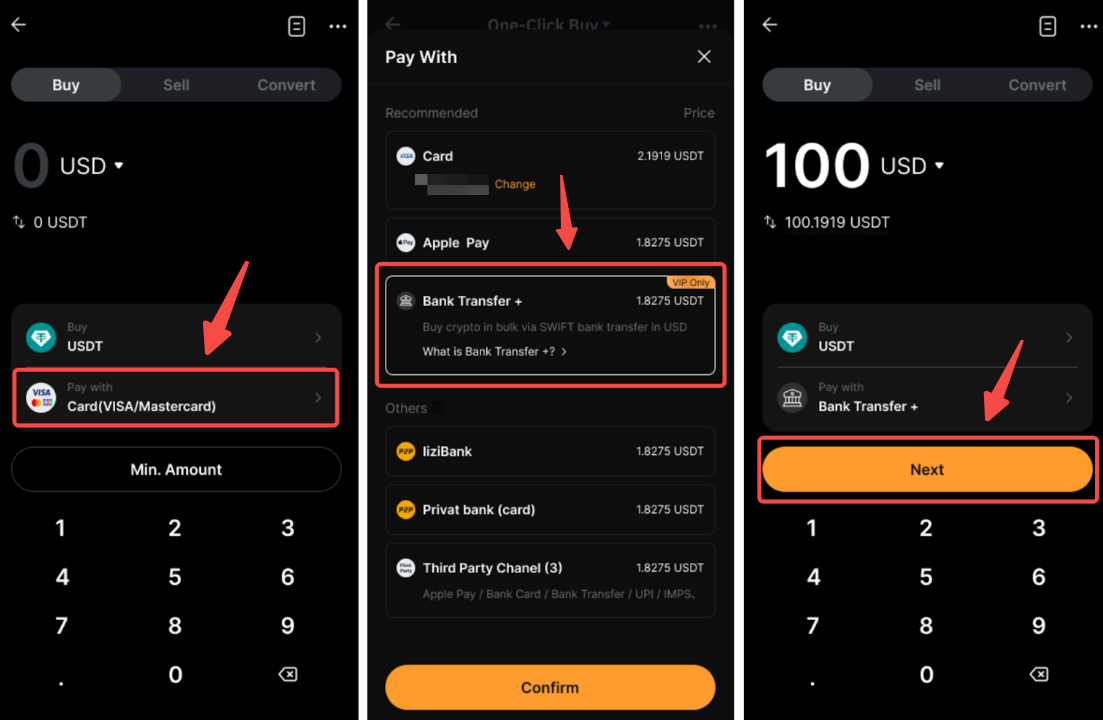
Step 1: Go to the Buy Crypto page, select Bank Transfer + as your payment method by tapping Pay with, then tap Next to continue.
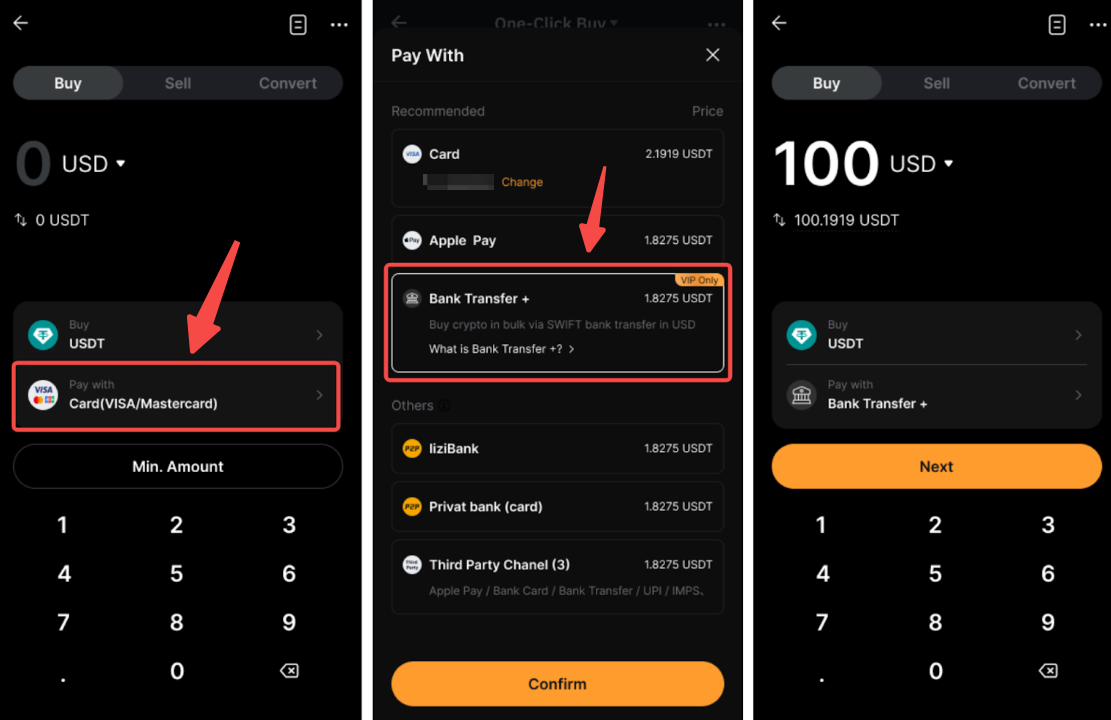
A short tutorial will guide you through the process. Tap Continue to view it or Skip Tutorial to proceed directly.
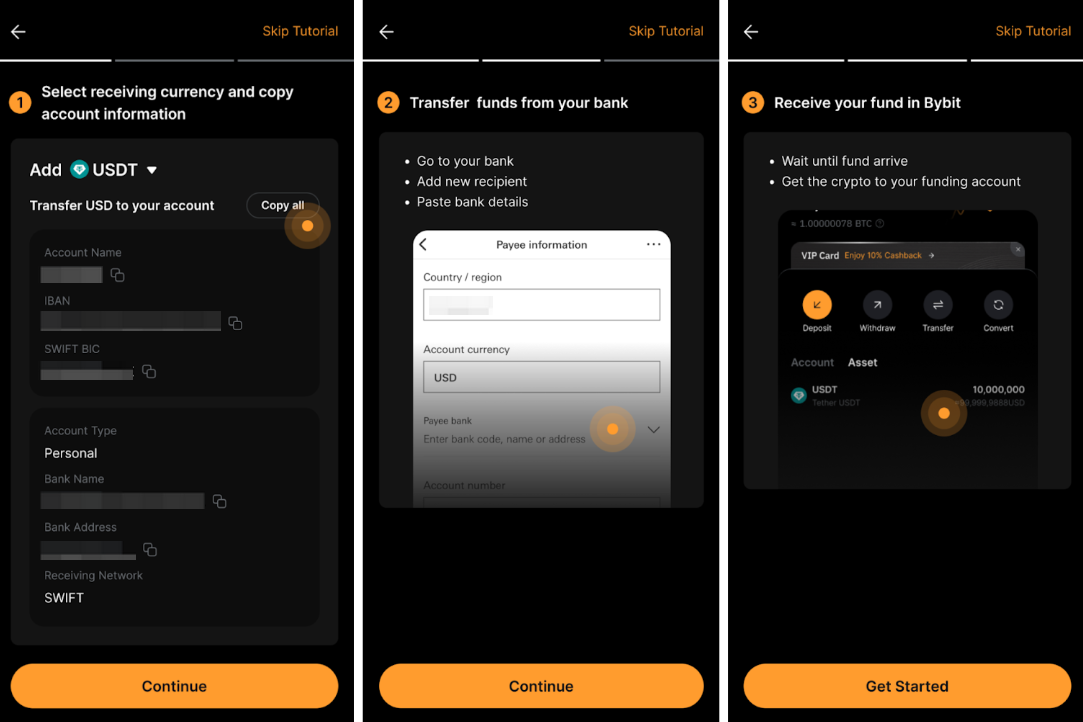
Step 2: On the Add Funds page, select USDT or USDC from the dropdown menu.
- The estimated exchange rate, processing time, and fees will be displayed automatically.
- Enter your fiat amount in the fund calculator to view the estimated crypto amount you will receive after conversion and fees.
- The information displayed is for reference only. Final amounts may vary based on real-time exchange rates and bank fees.

Step 3: Tap See Account Details, then tap Copy All to copy your account details.
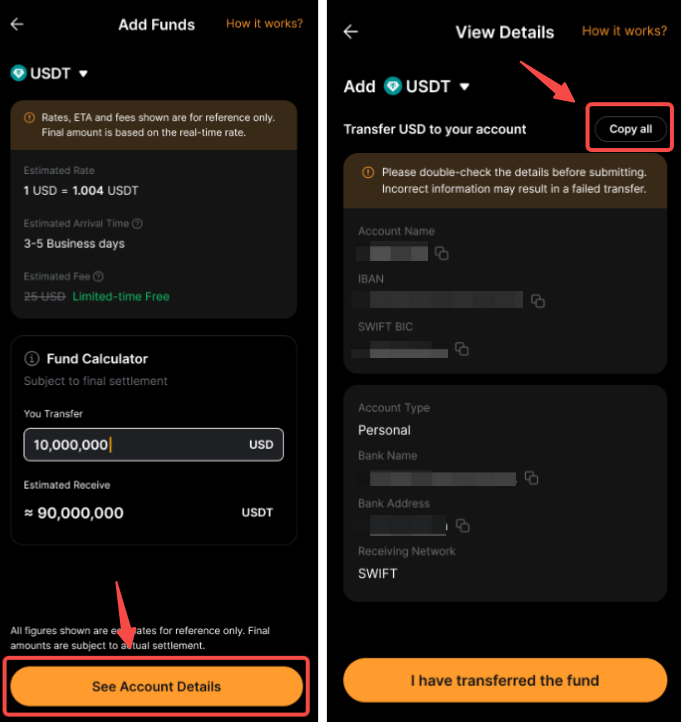
Step 4: Log in to your bank account and add your Bank Transfer + details as a recipient. Paste the copied details and initiate the transfer.
Step 5: After completing the transfer, return to the Bybit App and tap I have transferred the fund to check the transfer status.
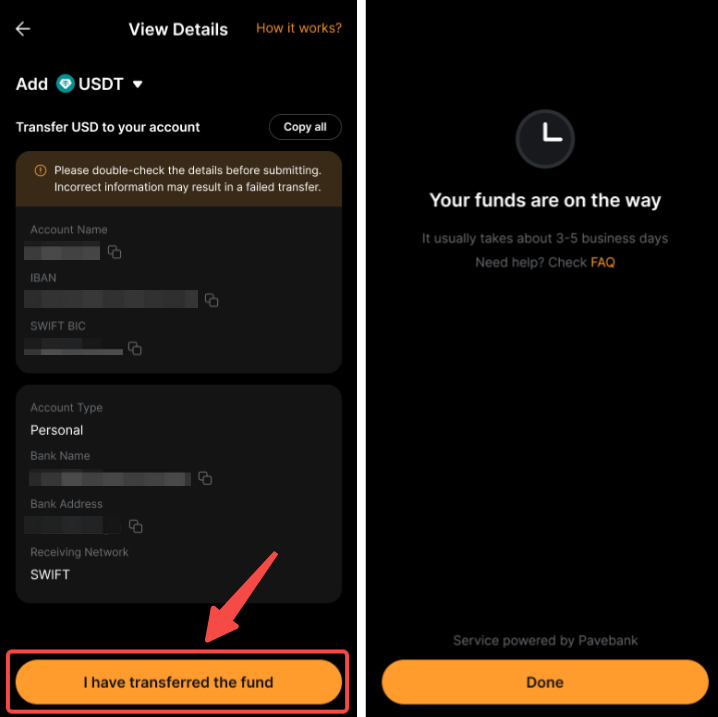
Step 6: Wait for the funds to arrive. Once received, the crypto will be credited to your Funding Account.
Notes:
– Transfers are processed via SWIFT. Please ensure all details are accurate before initiating the transfer to avoid delays or rejections.
– Processing times may vary. Funds are typically credited to your Funding Account within 5 business days.
– A fixed fee of $25 applies to each transaction.
– Transfers are subject to per-transaction, daily, and monthly limits based on your VIP level. Refer to the transfer page for more details.
– The bank account used for the transfer does not need to be in your name. Transfers from third-party accounts to Bank Transfer + are supported.
– If your transfer request is rejected, the funds will be returned to your original account in the original currency. For add-funds requests, fiat will be returned to your bank account. For transfer-out requests, USDT or USDC will be returned to your Funding Account. For more details, refer to FAQ — Bank Transfer +.
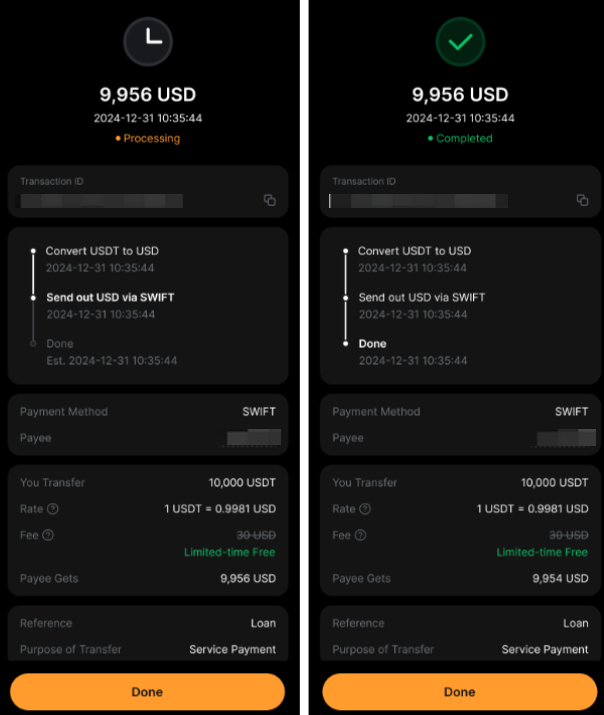
How to Transfer Out Funds via Bank Transfer +
With Bank Transfer +, you can withdraw your USDT or USDC as fiat directly to an external bank account.
Step 1: Go to the Buy Crypto page and switch to the Sell tab. Ensure that your receiving method is set to Bank Transfer +, then tap Next to continue.
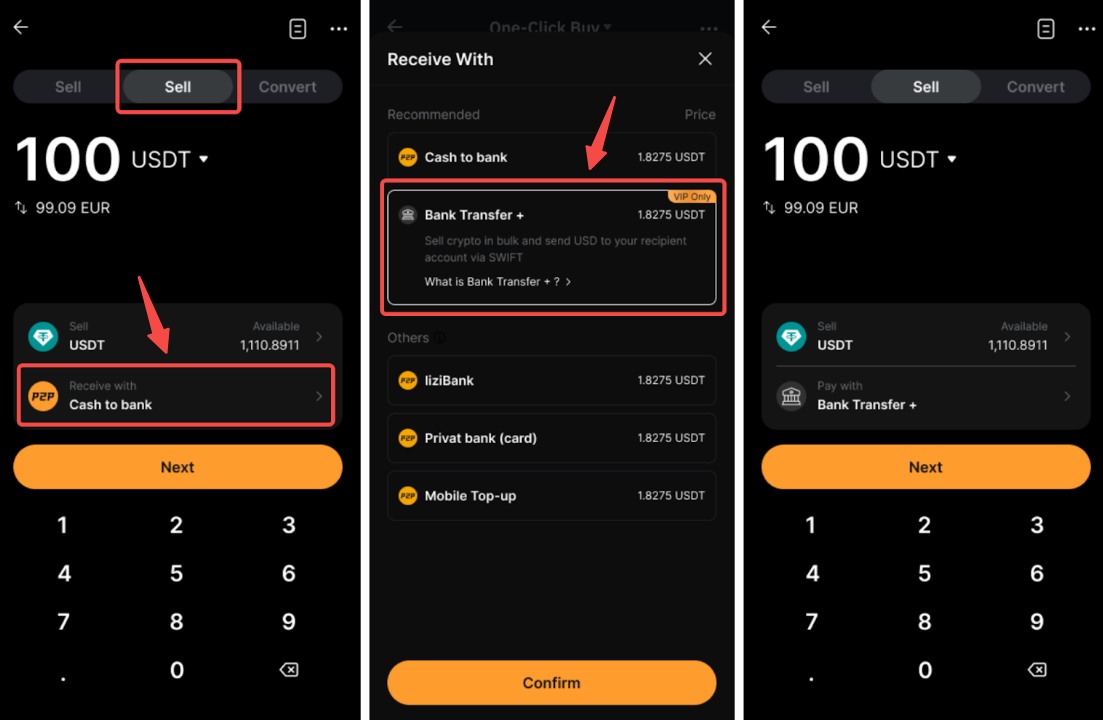
Step 2: On the Transfer Out page, enter the following details:
- You transfer: Select USDT or USDC, then enter the amount you wish to transfer.
- Payee receives: Select the fiat currency to receive. The estimated exchange rate and amount to be received will be displayed automatically.
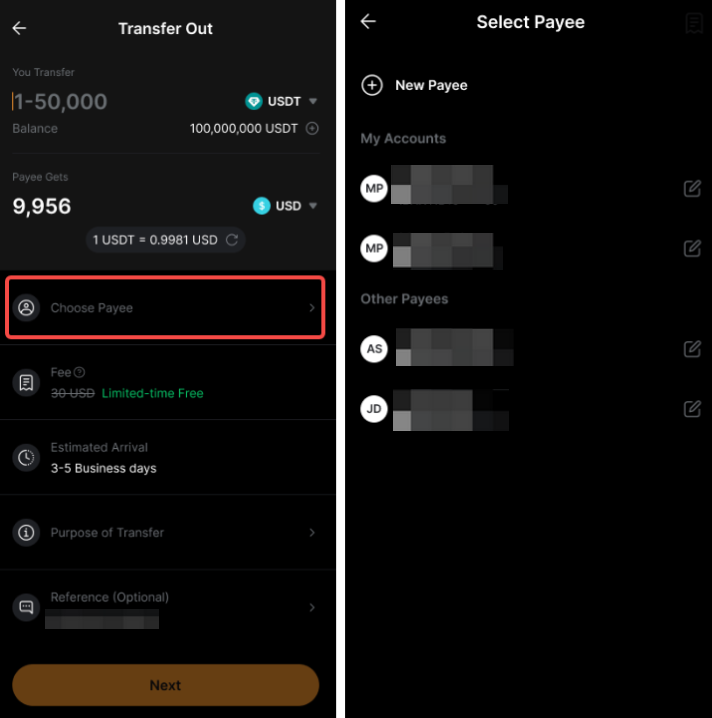
- Choose payee:
- Select from your existing payees, or
- Tap New Payee to add a new bank account. Enter the required details as you would for a standard SWIFT transfer.
- Once a transfer is completed successfully, the payee will appear under Recent payees for future use.
- Reference (optional): Add a note or remark if needed.
The estimated fee and arrival time will be displayed automatically.
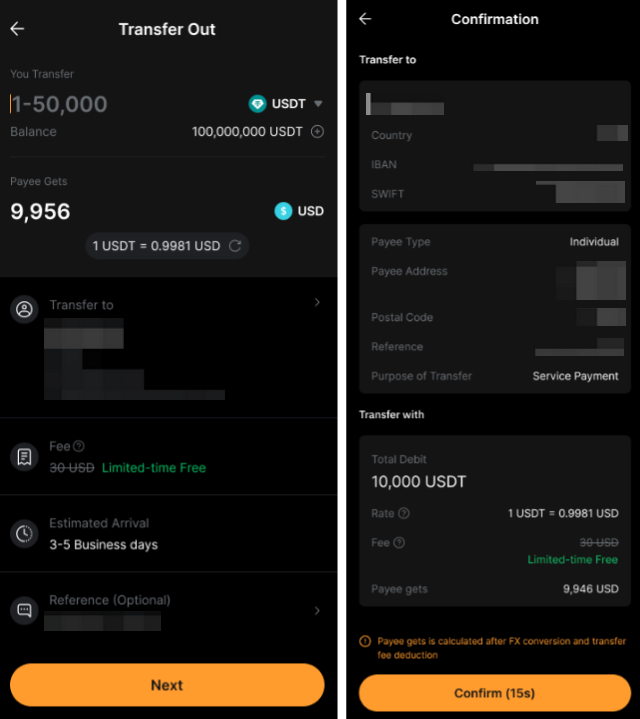
Step 3: Tap Next, review the details on the Confirmation page, and tap Confirm to proceed.
Step 4: Track the transfer status on the Order History page. You will receive a push notification and email once the transfer is complete.
Notes:
– A successful withdrawal from your Funding Account does not mean the funds have already arrived in your bank account. The actual arrival time depends on your bank's processing time.
– Processing times may vary. Funds are typically credited to your bank account within 5 business days.
– The bank partner and any intermediary banks involved in the transfer may charge processing fees for each transaction. These fees vary by bank. For example, a $30 fee from the banking partner and an additional $25 from an intermediary bank may apply.
– Transfers are subject to per-transaction, daily, and monthly limits based on your VIP level. Refer to the transfer page for more details.
– The receiving bank account does not need to be in your name. Transfers to third-party bank accounts are supported.
– If your transfer request is rejected, the funds will be returned to your original account in the original currency. For add-funds requests, fiat will be returned to your bank account. For transfer-out requests, USDT or USDC will be returned to your Funding Account. For more details, refer to FAQ — Bank Transfer +.
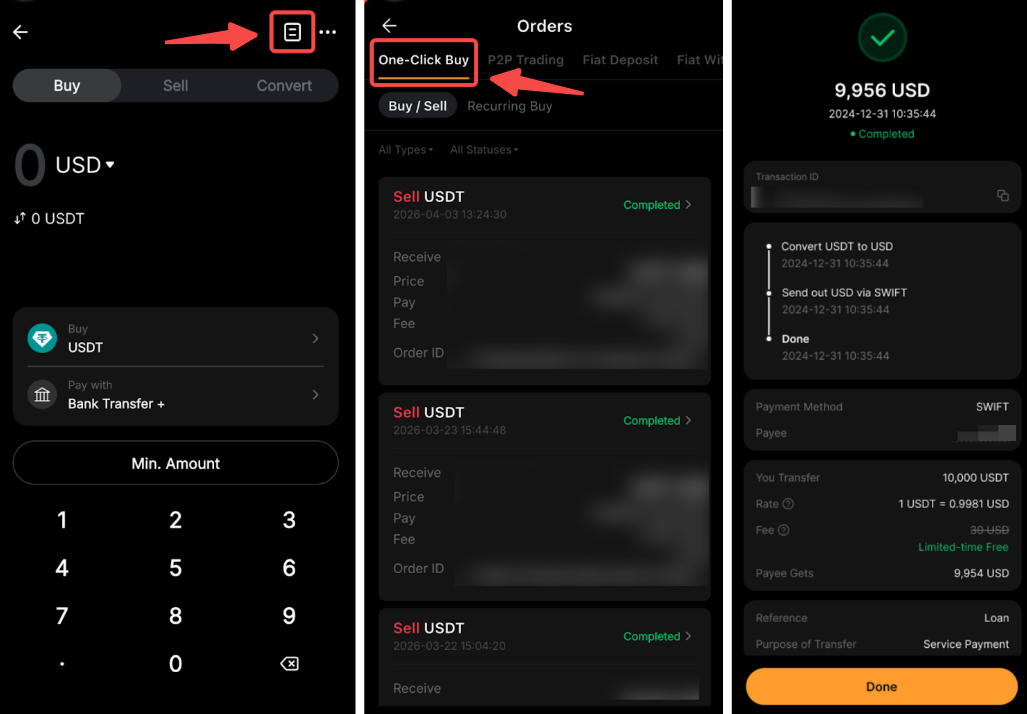
How to View Your Transaction Status
To check your transfer status, go to the Buy Crypto page and tap the History icon → One-Click Buy tab. Then, select the relevant Bank Transfer + transaction to view more details.